
How to Fill a Pre-Rolled Cone — Step by Step Guide
 Best Prices + Fast Shipping
Free Shipping on Orders Over $75
SHOP ALL
Best Prices + Fast Shipping
Free Shipping on Orders Over $75
SHOP ALL
Get a FREE Gummy or Vape
Sign up to get a FREE welcome vape or gummy on your first order when you buy 4 or more products.
Pre-rolled cones are the fastest way to get a perfectly shaped joint without learning to roll. You pack them instead of rolling them — which means less technique, less waste, and more consistent results. This guide covers exactly how to fill a pre-rolled cone properly, what mistakes cause uneven burns and clogging, and which Blazy Susan cone size is right for your session.
What You Need to Fill a Pre-Rolled Cone
- A pre-rolled cone (Blazy Susan 1-1/4″, King Size, Queen Size, or Shorty)
- A grinder
- A packing tool — a pen cap, chopstick, or the included cone packer if your cones came with one
- Your ground material
How to Fill a Pre-Rolled Cone — Step by Step
- Grind to medium-fine consistency. This is the most important variable. Too coarse and the material won’t pack evenly — you’ll get air pockets and an uneven burn. Too fine and the material compresses into a plug that restricts airflow. Medium-fine is the sweet spot — visible texture, no powder, no large chunks.
- Hold the cone upright with the wide end up. Rest the filter tip end on your rolling tray or a flat surface so the cone stands on its own. This keeps the material from falling out as you fill.
- Add material in small amounts. Don’t dump everything in at once. Add a small pinch, let it settle, then add more. This prevents air pockets from forming in the middle of the cone where you can’t reach with the packing tool.
- Pack after every few additions. Use your packing tool to gently tamp the material down toward the filter tip. Light pressure, not aggressive packing — over-packing compresses the material too tight and kills airflow. You want the material settled and even, not compressed into a brick.
- Repeat until you reach the shoulder of the cone. The shoulder is where the cone starts to narrow toward the open end. Fill to about 3-4mm below the shoulder for standard sizes. Leave 5-6mm for King Size cones.
- Do a test draw before sealing. Hold the cone upright and draw slowly through the filter tip without lighting it. Good airflow = properly packed. Tight or no airflow = over-packed. If it’s over-packed, use the packing tool to gently loosen the top layer.
- Twist the open end to seal. Pinch the open end of the cone between your fingers and twist it shut. This seals the material inside and prevents anything from falling out when you pick it up. Twist until the paper is fully closed — don’t just fold it over.
- Light the twisted end, not the filter. Light the twisted tip and rotate the cone slowly as you bring it to your lips. Rotating the cone during the first few seconds of lighting produces an even cherry that burns straight down without canoeing.
Which Blazy Susan Cone Size Should You Choose?
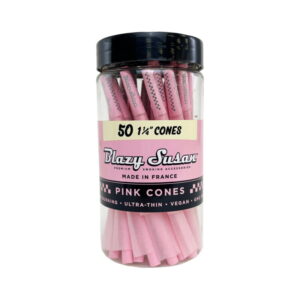
- Shortys (53mm): Quick solo session. Holds roughly half the material of a 1-1/4″. Best for microdosing or a quick break. Fills in under a minute.
- 1-1/4″ (84mm): The industry standard. The right size for most solo sessions and small groups of 2. Most widely available size. The default choice for first-time cone users.
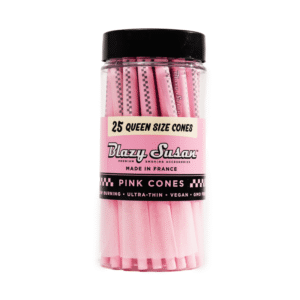
- Queen Size: Between 1-1/4″ and King Size. For solo heavy smokers who consistently find 1-1/4″ not enough but King Size too much for one session.
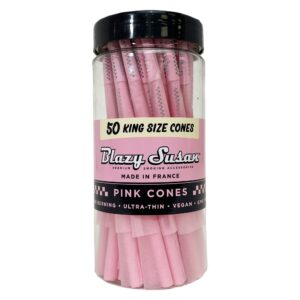
- King Size (109mm): Group sessions and heavy daily smokers. Holds significantly more material than 1-1/4″. Takes longer to fill but burns proportionally longer.

Common Cone-Filling Mistakes and How to Fix Them
Uneven burn (canoeing): Usually caused by uneven packing — one side of the cone has more material than the other. Fix by packing more carefully in small, evenly distributed amounts. Also fix at the lighting stage by rotating the cone slowly during the first 10 seconds.
Tight airflow / hard draw: Over-packed. Too much material or too much compression with the packing tool. Fix by using the packing tool to loosen the top 10mm of material. If the whole cone is over-packed, gently squeeze the exterior of the cone from tip to filter to loosen the fill.
Material falling through the filter: Grind is too fine — powder-level material bypasses the filter. Fix by grinding coarser. A very fine grind also causes the cone to smoke harshly and get clogged faster.
Cone burns fast and hot: Under-packed. Not enough material per draw, causing the paper to burn faster than the fill. Add more material and pack more firmly on the next cone.
Cone collapses or dents: Over-moistened paper from handling with wet fingers, or the cone was stored in a humid environment. Always handle cones with dry hands and store them in the jar with the lid closed.
Frequently Asked Questions:
How do you fill a pre-rolled cone without a packing tool?
Use a pen cap, a chopstick, a toothpick, or the thin end of a ballpoint pen. Any thin, blunt instrument that fits into the cone and can apply gentle downward pressure works as a packing tool. The goal is to tamp material down evenly, not to compress it aggressively.
How much material fits in a Blazy Susan 1-1/4″ cone?
Approximately 0.5–0.7 grams depending on grind consistency and pack density. A medium-fine grind packed to comfortable draw resistance fills a 1-1/4″ cone to roughly 0.5-0.6 grams. King Size cones hold approximately 0.8–1.2 grams.
Why does my cone burn unevenly?
Uneven burn (canoeing) is almost always caused by uneven packing or uneven lighting. Pack material evenly in small amounts and tamp after each addition. At lighting, rotate the cone slowly during the first 10–15 seconds to establish an even cherry before drawing. If canoeing starts mid-smoke, wet a fingertip and lightly dampen the fast-burning side to slow it down.
Can you reuse a pre-rolled cone?
No — pre-rolled cones are single-use. Once smoked, the paper and filter are spent. Blazy Susan cones come in 50CT jars and full boxes precisely for this reason — buying in bulk at DeltaCloudz is the most economical way to keep cones in rotation without running out. → Shop all Blazy Susan cones at DeltaCloudz
Blazy Susan products at DeltaCloudz are tobacco-free and nicotine-free rolling accessories. Intended for adults 21 and older. Check local regulations before purchasing.